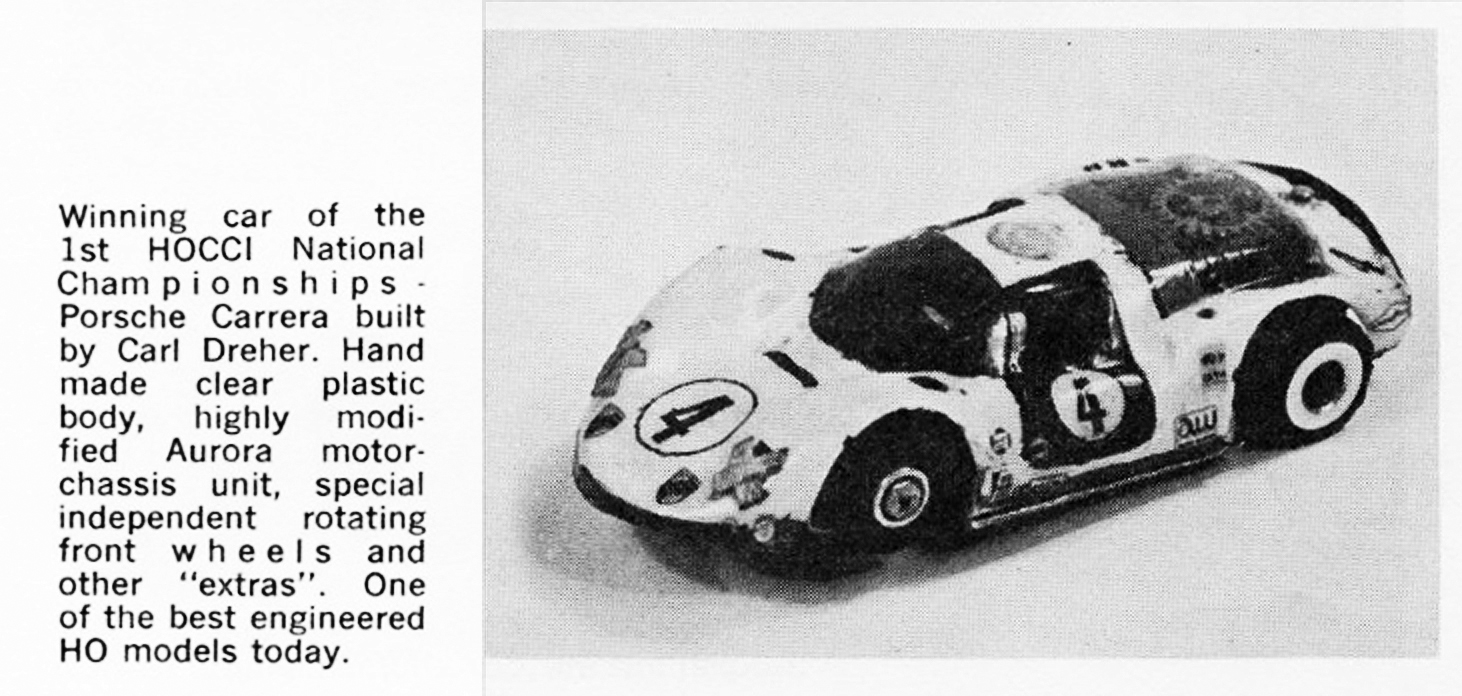
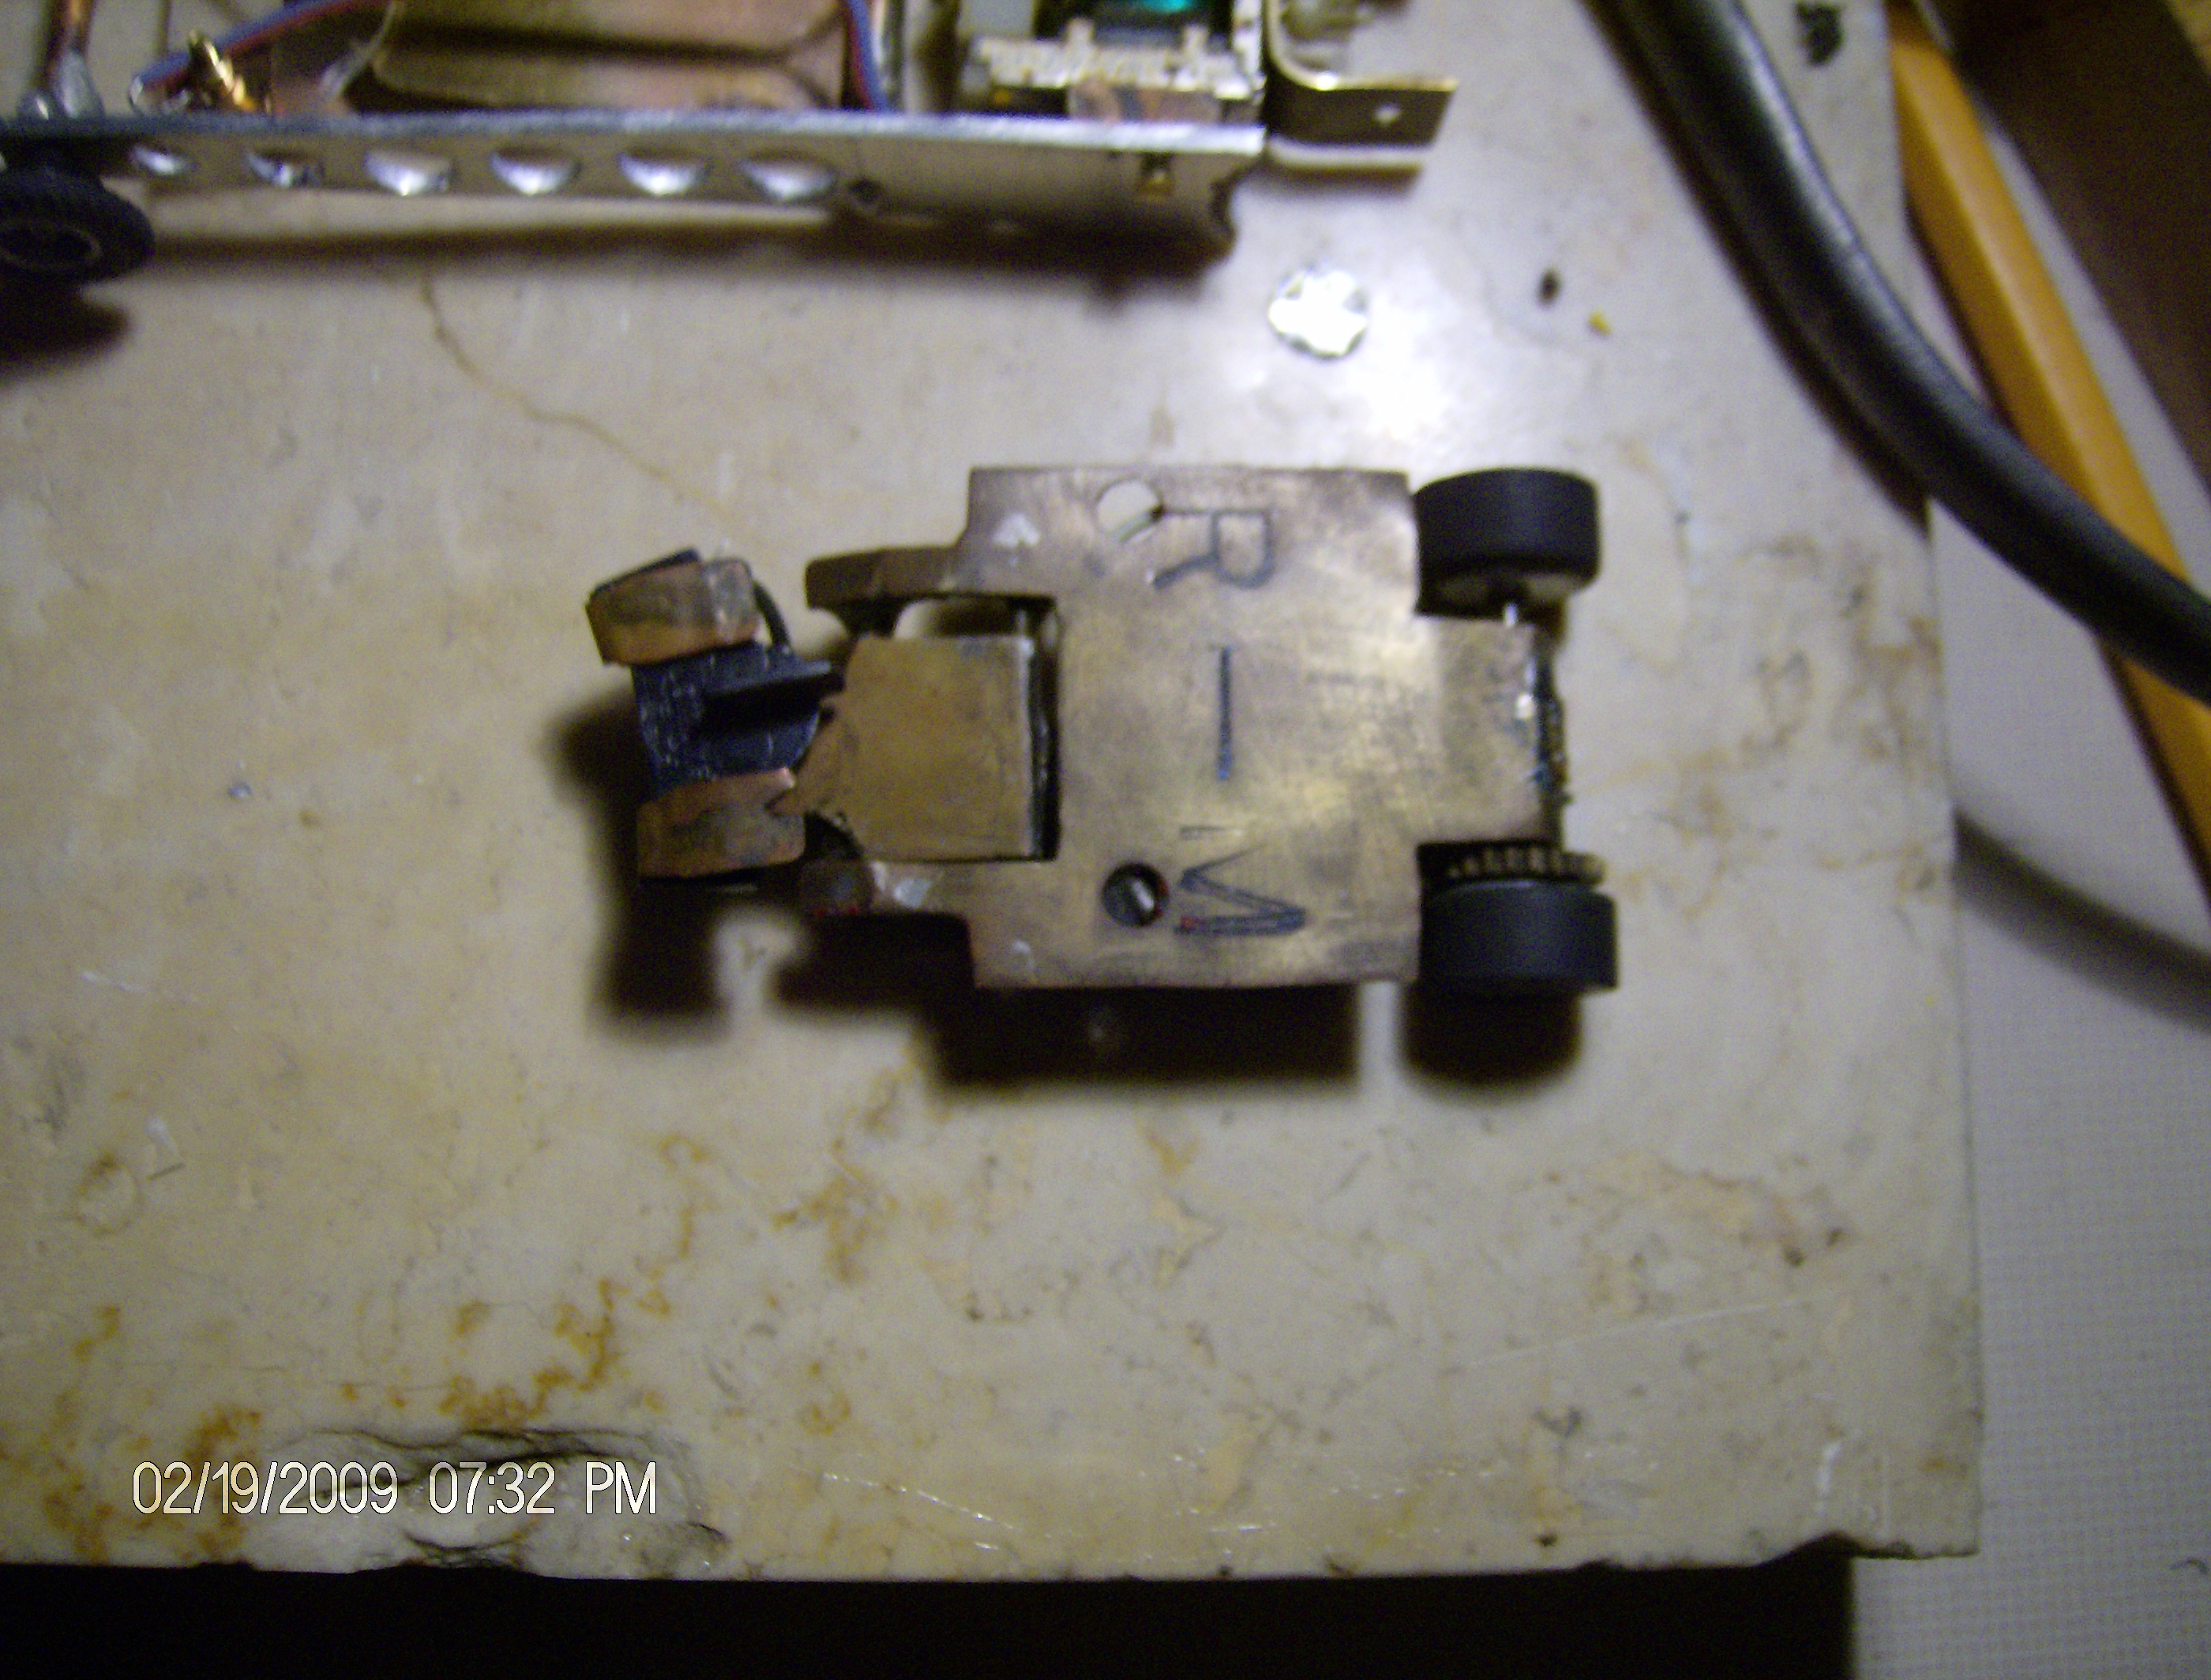
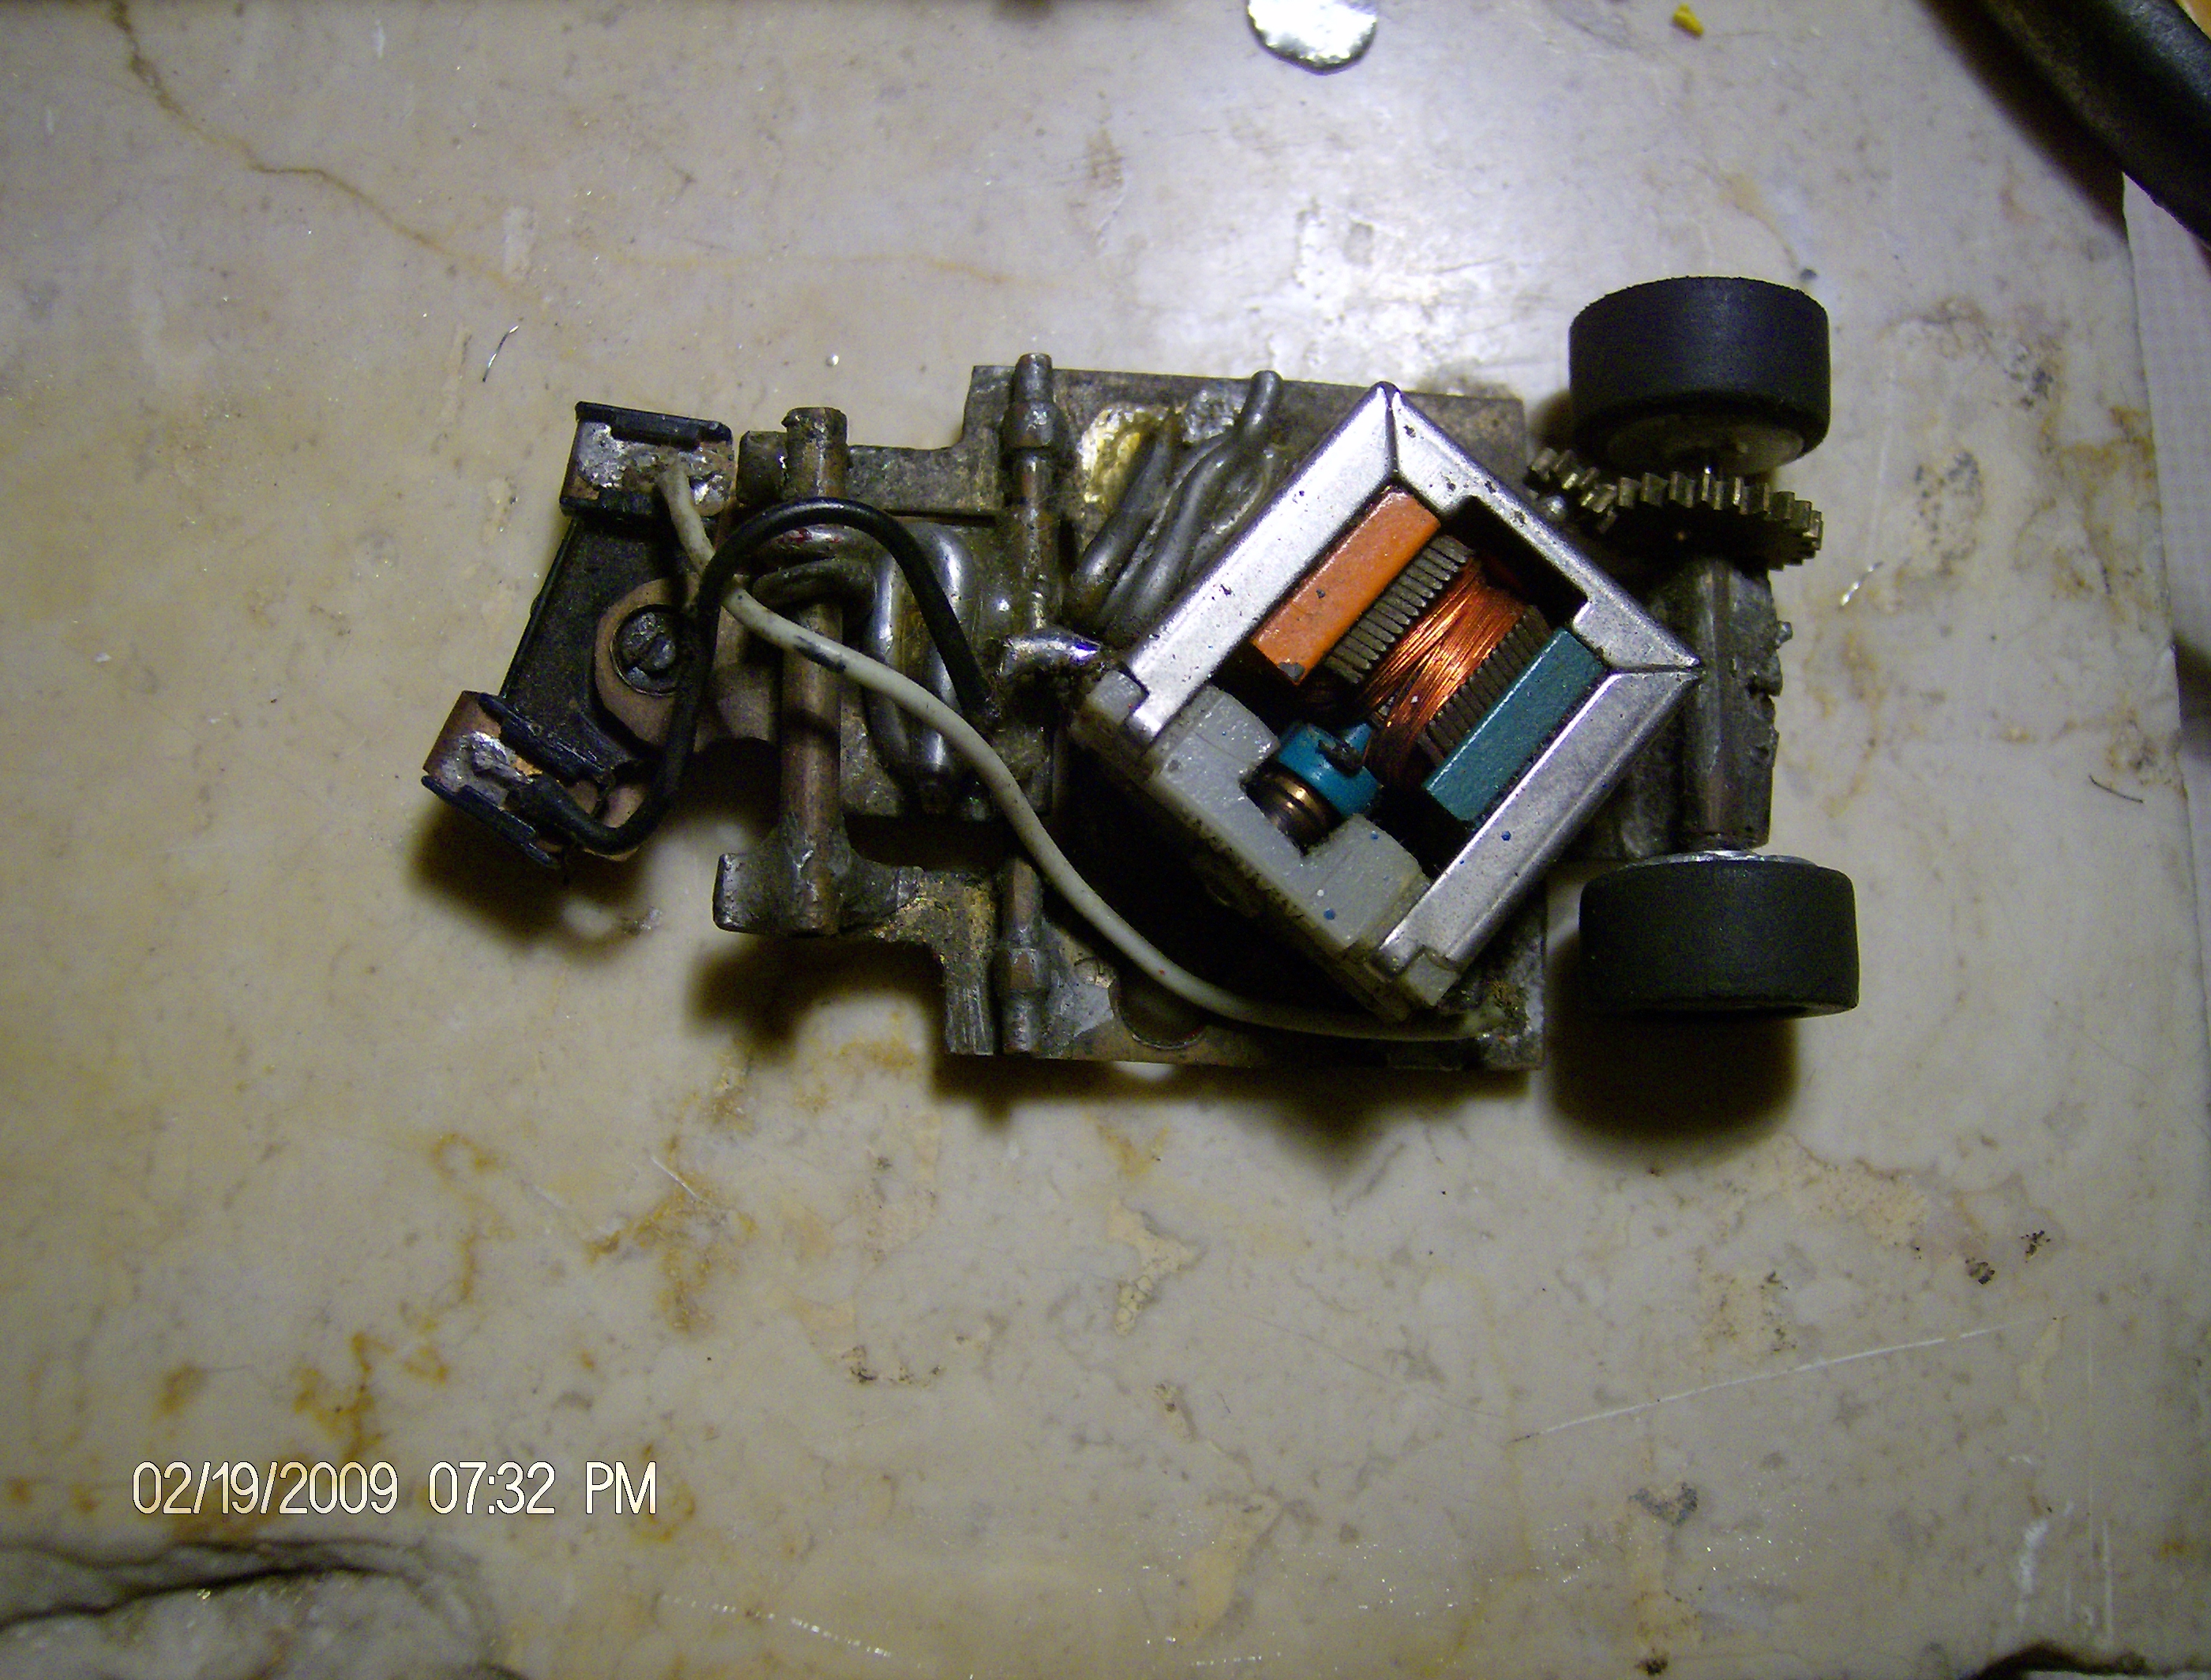
(click images for larger)
Items From the archive of Carl Dreher
February 2009
------------------------------------------------------------------------------
1968 Modified T Jet, Iso Pan experiments
"I'm attaching three photos of what was by far my most successful
HO racer,m circa 1968. It was built on a TJet chassis, of course.
What was innovative about
it can be seen on the bottom. There is a center pan, surrounded by an outer
perimeter pan that can move front/back/left/right about 3/32 inch. The body
attaches to this outer pan. The outer pan does not hinge at the front like designs
which came later in history. It is constrained to work in the same plane as
the inner pan. It has nil up/down freedom.
I experimented extensively on early designs to isolate the body from the
chassis. Those tests paid off well in terms of handling. Anything that allowed
the
car to absorb track vibrations and keep the tires on the road really helped.
I also tried allowing the entire pan to float, but this always proved
temperamental and too often resulted in the pan shorting against a high-spot
on a track. Then I hit on this idea of making the pan in two parts and letting
the
perimeter of the pan, with the body and balance weights, float. Took a long
time to make but it worked wonders. The result was a great handling car and
very
forgiving to drive.
The three holes on the bottom are there for quick maintenance during a
lane swap. I could give the armature and brushes a quick shot of lube. The center
pan
is insulated from the Pat Dennis brush
tubes by some thin tape.
Notice the amount of lead in front of the axle and on the leading edge
of the outriggers. I always biased my cars with weight on the front to keep
it in the
slot. There should also be a lead weight glued in behind the front axle, but
that seems to have gone missing.
The front axles slides back and forth, using Faller springs to center it.
The brush tube leads are soldered to the pickup shoes. I found a fresh pair
of shoes
could go a full race without replacement, thus the soldering."
------------------------------------------------------------------------------------------
More on how to set up a car:
The brush tube setup was taken from Pat Dennis' article in Car Model magazine.
I used K&S brass tubing (size? probably 5/32) and .015 for the end caps,
soldered them together and trimmed. The holes where the TJet brush spring arms
were enlarged so the tubes would fit and I put a dab of epoxy around them. The
old brush spring arms were removed, of course. The holes weren't just drilled
out... they were offset very slightly in the direction of rotation to give some
advance to the timing. Finally, some thin wire was run from the pickup shoes
to the sides of the tubes. I'm trying to remember what brush springs I used.
I
genrally used the Aurora pickup-shoe springs, but getting the right height was
critical. I remember spending a lot of time on the bench removing a tiny snippet
of coil, reassembling the motor, and running it, listening to the RPM. There
was a magic amount of pressure that gave good brush contact but not too much
friction. Eventually, I could do it by feel. I also tried the very flexible
brush tube springs that Faller used on their HO cars which had, stock a brush-tube
setup. As I recall, they worked very well.
Rewinds: As I recall, my best wind was 12.5 feet of #37. I was never able to
get a #36 wire wind to survive. It just drew too much current and would burn
up
brushes and eventually, itself, from the heat. I know some other guys were able
to make a #36 rewind work, and when they did, they were very fast.
Magnets: Sorry, don't remember much. I think I used the "hop up"
magnets Aurora sold. I never found any of the other after-market magnets to
be any advantage
or to last very long.
Funny thing about magnets and rewinds: There was a sweet-spot that matched
my driving style. I could build a killer fast motor with super strong magnets
and a
wild rewind but when backing off the throttle, a motor like that would cause
the car to stop suddenly from brush friction, dynamic braking and the strong
magnets. Motors like that also had a bit of hesitation on acceleration. My driving
style was much more of a "coast-through-turns" type, so I wanted motors
that were more forgiving.
Other things how I set up a car:
1. I always trimmed a sliver of material from the TJet chassis "ears"
that held the magnets in place, so the magnets would be closer to the armature
to reduce
the flux (air) gap. Then I put a piece of shim stock (steel) behind each magnet
to hold it in place.
2. Front axles were 1/16 brass tubing with Faller springs to center the axle.
The brass axle risked being bent in a crash but I almost never had that happen
in a race and, being brass, it was easy to solder a brass washer on the end
to keep the wheel on. Some guys tried to put bent pins in a brass tube to keep
the
wheel on, but I saw too many of those come loose. I usually turned the stock
front Aurora tires down a bit and gave them a coating of clear nail polish,
then
trimmed the length of the guide pin for the best clearance. Some tracks weren't
built too carefully and so it wasn't unusual to need to trim the guide a bit
more, or in the opposite case, put larger front tires on the hub to gain ground
clearance for a bumpy track.
3. I always used a stock Aurora guide pin. Super reliable. I tried every kind
of guide flag and even built some of my own and rejected them for one very
specific reason: In a race, if you come off, you are at the mercy of the turn-marshal.
Even a ham-fisted turn-marshal could slam a guide-pin equipped car back
into the slot, but a guide shoe took a lot longer and was subject to being broken
off by a guy who was in a hurry.
4. I always used the long-wheelbase axle hole in the chassis. That gave the best handling.
5. I always soldered the first gear to the armature, since I had seen too many
come loose in a race. I think I normally soldered the rear pinion shaft to the
rear gear-plate gear. Never soldered the pinion gear to the shaft... never had
a problem there.
6. I always used the stock pinion/crown gears because I found the stock ratio
(as opposed to Aurora's "hop up kit" ratio) much more responsive.
See my previous
comments on driving style. I *think* some of the guys using a #36 rewinds were
trying the higher hop-up kit gearing because they could pull that high ratio
with the more powerful motor. Not totally sure about that. We were all rather
secretive.
7. I never mentioned the type of brushes I used. The Faller brushes, with the
nipple on the bottom that were designed for brush-tube springs, were WAY better
than stock Aurora or any of the after-market brushes, including the so-called
"silver" brushes. The Faller brushes seemed to have a low coefficient
of friction
as well as good electrical properties. I used to buy all the Faller parts I
could through the Hobby House in Monroe LA.
8. Tires and hubs: I used LaGanke (sp?) hubs exclusively, and epoxied sponge
rubber tires on them. (I don't remember where I got the black sponge donuts.)
Then I'd turn them to size. I do remember doing a lot of "blue printing"
in the sense that there was considerable width variation in a batch of blank
donuts,
and I'd get a couple dozen sets and then find the widest that were still within
the rulebook. By the way, when I met Pat Dennis for dinner, he also mentioned
Tim Laganke, and what an honest guy he was. One of the few guys you could trust
not to rip you off and would pay for rights to your ideas. Wonder where he is
-----------------------------------------------------------------------------------------------------------
June 1970 Car Model Magazine: Carl Dreher Tames the Tycopro
This appears to be the magazine car and photo "mule"......

(click for larger)
here is page 2 and
page 3
Auto World Speed Secrets.....

full article on these links....page
1 page
2 page
3 page
4 page
5 page
6
About this body: "Speed Secrets" body....Ah the Porshe
body! You won't find any of those unless you can find someone who bought them
from me when I was selling them mail order. I made those on a
Mattel Vac-U-Form machine. The basis for the body was a Lindburgh (sp?) plastic
Porsche 906 (I think) kit. I widened it, raised the rear window to clear the
gears at the back of the TJet chassis and enlarged the front wheel wells so
a pickup shoe at full up-position would clear the body. Then I made a single
Vac-U-Form body over that model and poured a plaster master from that female
mold. From there on, I could make as many as I wanted. The hard part was finding
the clear-plastic for the Vac-U-Form. You had to buy a big stack of that Mattel
plastic (they were sold in packets of mixed colors) to get a couple of pieces
of clear. For some reason, the clear held up better to the heat given off by
the slot car, and of course, you could paint it inside to look nice. I tried
making bodies from the colored plastic they had, thinking I could save some
weight by not having to paint it...yes, I was a fanatic about weight...but the
plastic always melted from the motor heat.
---------------------------------------------------------------------------------------
September 1973 Car Model Magazine
AFX build....page 1 page 2 page 3
---------------------------------------------------------------------------------------
Various Photos from the C Dreher lot purchased on ebay....
here are pics of another R-M chassis...anyone know more about these? (Collection
John F)


Full brass pan
That photo (BELOW) is of a chassis for an Indy/F1 car. Notice the pan has no outriggers, and notice the silly rollbar and the remains of a driver cockpit. The HOPRA/HOCCI rules were real specific about how wide the body could be in the class. My cars were OK in the class, but weren't my best. GTs were always my favorites.
More detail on this indy build...